Add Row
Add Element
Southeast Michigan Home and Yard Logo
update
update
Add Element
  • Home
  • Categories
    • Home
    • Yard
    • Technology
    • News
    • Food
    • Events
    • Featured

Southeast Michigan

HOME AND YARD

  • Facebook Home and Yard Page
    update
  • update
  • update
  • update
  • update
  • update
  • update
May 01.2025
3 Minutes Read

Colorful Pollinator Helpers: 5 Stunning Purple Weeds for Your Garden

Vivid purple flowering weeds in a lush green garden.

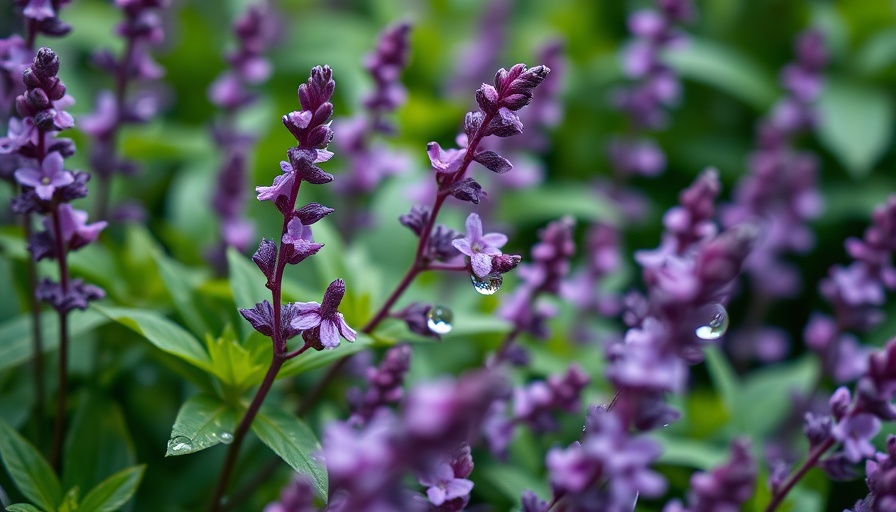
Transform Your Garden: Embrace Weeds With Stunning Purple Flowers

In the world of gardening, we often see weeds as mere invaders, unwanted plants that take over flower beds and lawns. However, there are certain flowering weeds that deserve a second glance, especially those with beautiful purple flowers! Not only do they add bursts of color to your garden, but many of them also attract vital pollinators such as bees and butterflies. Homeowners in Southeast Michigan can explore these options to enhance their gardens while fostering local wildlife.

Why Purple Flowering Weeds Matter

As we get ready for planting season, understanding the role of purple flowering weeds in our gardens becomes crucial. These plants often flourish in sunlight and may provide nectar or pollen when other blooms are hard to find, especially in the early spring or late fall. Incorporating these colorful weeds into your yard can help sustain bee populations, contributing to a healthier ecosystem in Southeast Michigan.

Meet 5 Eye-Catching Weeds with Purple Flowers

Here’s a shortlist of purple flowering weeds that you might want to consider for your pollinator garden or naturalistic areas:

  • Burdock: Known for its large leaves and striking thistle-like flowers, burdock can grow up to 5 feet tall within a single season. However, it is considered invasive in many areas, so keep an eye on its spread.
  • Fleabane: Resembling miniature daisies, fleabane not only looks lovely but potentially wards off pests too, thanks to its pest-repelling compounds.
  • Wild Violet: With its heart-shaped leaves, wild violet produces small purple flowers. While it can be invasive, managing it early helps control its spread.
  • Purple Deadnettle: This early-spring bloomer is not only attractive with its purple flowers but also serves as an important food source for pollinators like bees.
  • Chicory: Commonly found blossoming along roadsides, chicory flowers are edible and beautiful, enhancing the wildflower garden scene in your backyard.

Care Tips for Weeds With Purple Flowers

While some of these weeds can be invasive, proper management strategies can keep them in check. For instance, hand weeding is effective for plants like purple deadnettle due to its shallow root system and intolerance of mowing. When dealing with wild violet, consider using broadleaf weed killers if you're not keen on manual removal. It's essential to strike a balance—allowing the flowers to bloom for the pollinators before they are pulled out can lead to a sustainable and vibrant garden.

Making Informed Choices: Weeds Vs. Native Plants

Choosing to incorporate certain weeds is an excellent way to diversify your garden. However, homeowners must differentiate between native and non-native weeds. Native weeds often adapt best to local conditions and support current wildlife populations. Some non-native species may outcompete local flora, leading to biodiversity loss, so think carefully before planting. Consult local gardening experts or resources to determine the best options for your garden.

As you consider these colorful additions, think about not just their beauty, but the ecological impact of your gardening choices. Incorporating purple-flowering weeds into your green space is an opportunity to support local wildlife while also enjoying the aesthetic rewards in your yard.

Home

Write A Comment

*
*
Related Posts All Posts
07.18.2025

Quick DIY Tips to Repair Vinyl Plank Flooring Like a Pro

Update Understanding Vinyl Plank Flooring Care Vinyl plank flooring, a popular choice among homeowners in Southeast Michigan, is lauded for its durability and aesthetic appeal. However, like any flooring material, it can suffer from wear and tear over time. Knowing how to care for and repair your vinyl planks can extend their life significantly, keeping your home looking sharp and fresh. Essential Tools and Materials for Repairing Vinyl Plank Flooring When it comes to fixing your vinyl flooring, having the right tools is essential. Here’s what you need: Chisel Circular saw Hammer Oscillating saw with plunge blade Pencil Pry bar Pull bar Rubber mallet Straightedge Utility knife Finish nails Replacement plank Superglue Gathering these will set you up for success! Method 1: Replace a Damaged Plank with Ease High-quality vinyl planks are designed for easy repairs, especially when it comes to replacing a damaged plank. Follow these steps to replace a plank: Remove the baseboard: Carefully score the top edge with a utility knife to break the bond with the wall paint. Gently remove the baseboard using a hammer and pry bar. Pry up the damaged floor: Begin at the corner where the last piece was installed, using your pry bar to pop it up. This process is usually straightforward in smaller rooms but may require professional help in larger spaces. This method maintains the integrity of your floating floor and ensures a seamless look after the repair. Alternative Repair Method: Glue Down If your flooring isn’t of high quality and can’t be unclicked, a glue-down technique can be used. However, this approach changes your flooring style from floating to glued down, which might lead to issues later on: Cut out the damaged plank carefully. Modify your replacement piece to fit snugly. Apply superglue and set the plank in place. While not ideal, this quick fix might get you through until you can replace the flooring entirely. Future Care Insights: Keeping Your Vinyl Flooring Pristine To avoid needing repairs in the future, ensure you maintain your vinyl flooring diligently. Regular cleaning using non-abrasive cleaners and protective mats in high-traffic areas can greatly reduce wear. Knowing how to repair your vinyl plank flooring not only saves time but also keeps your home looking its best. While some jobs can be handled as a DIY project, always consider the size and complexity of the task at hand. Ultimately, balancing DIY repairs with professional help ensures longevity and quality in your home improvement projects.

07.17.2025

Master Heat Pump Thermostat Wiring: A DIY Guide for Homeowners

Update Understanding Heat Pump Thermostat Wiring Wiring a heat pump thermostat may sound intimidating, but it's a task that many homeowners in Southeast Michigan can tackle on their own. With a few simple tools and a bit of guidance, you can upgrade your HVAC system’s functionality and efficiency by replacing that old thermostat. Essential Tools and Materials Before diving into wiring, gather the necessary tools: Marker for labeling Non-contact voltage tester Phillips and flathead screwdrivers Wire strippers You'll also need a new heat pump thermostat, electrical tape or masking tape, and mounting screws. Having everything in one place will make the process much smoother. Step-by-Step Instruction for Wiring Your New Thermostat Ready to replace that old thermostat? Follow these simple steps: 1. Turn Off the Power The first and most crucial step is ensuring your safety. Locate the disconnect switch for your HVAC system or turn off the circuit breaker to prevent any electrical mishaps. Remember, safety first! 2. Verify the Wiring Next, carefully remove the existing thermostat's faceplate. Use your non-contact voltage tester to confirm that no power is flowing to the thermostat. Take a photograph of the existing wiring so that you can easily replicate the setup. 3. Remove the Old Thermostat Gently remove the wires from the terminal block, labeling them with pieces of tape if desired. Once all wires are detached, unscrew the thermostat from the wall and set it aside. 4. Attach the New Thermostat Thread the thermostat wires through the base of your new thermostat. Level it on the wall and secure it with the provided screws. Then, attach the wires to their respective terminals as noted in your earlier photo. Common Misconceptions About Thermostat Wiring One might think that thermostat wiring is a task only for professionals, but that's a misconception. Many homeowners are perfectly capable of wiring their thermostats, provided they follow clear instructions. Dismissing DIY projects denies you the chance to save money and gain new skills! The Value of Tackling This DIY Project Replacing your thermostat can significantly enhance your home's heating efficiency. A modern, smart thermostat could lead to energy savings and greater control over your home's environment. It’s a relatively inexpensive upgrade that pays dividends in comfort and energy costs! Why Knowing This Information Matters For homeowners in Southeast Michigan, understanding how to wire your heat pump thermostat can empower you to make quick fixes yourself, fostering a more self-sufficient lifestyle. Not only does this enhance your home, but it also builds confidence in managing your property’s upkeep. Now, are you feeling more confident about taking on this thermostat wiring task? If you enjoy DIY projects around the house, keep learning and trying new things. Remember, if ever all else fails, there’s no shame in calling in a professional!

07.17.2025

What Homeowners in Michigan Need to Know When Hiring Contractors

Update Understanding Your Home Renovation Needs With more time spent indoors than ever, many of us have started thinking creatively about our living spaces. Whether it's a cozy nook or a full kitchen remodel, home renovations have seen a significant uptick. However, tackling these projects can overwhelm anyone. That’s where hiring the right independent contractor comes in, ensuring your vision becomes a reality without the headaches. Are They Qualified to Transform Your Space? The crucial first step in hiring an independent contractor is verifying their qualifications. While stepping into a new renovation might sound exciting, it's vital that your contractor is well-equipped for the job. An excellent way to gauge this is through their online presence. Review their website showcasing past projects, client testimonials, and qualifications. This will provide insights into their capability and professionalism. In addition to their website, social media platforms can offer a glimpse into their recent works and client interactions. Homeowners might find comfort in seeing how a contractor handles feedback. Essentially, don’t shy away from asking them about their licenses and training. Licensed contractors typically carry a sense of commitment and professionalism that can minimize your worries during the renovation process. Do They Align with Your Vision? After confirming they are qualified, it's crucial to find out if they see the world the same way you do. A great contractor will invest time in understanding your vision. They should be eager and able to visualize the bigger picture of your desires, whether it’s an open concept kitchen or a luxurious spa-like bathroom. Discuss your ideas openly – whether inspired by designs from Pinterest or recent home improvement shows. The goal is a healthy collaboration, ensuring both parties are on the same page before diving into the project. Budgeting: What Can You Afford? Budgeting for renovations can be daunting but breaking it down can help ease the burden. Make a list of priorities for your home transformation. You might want to transform your kitchen today, while a new bathroom can wait. This prioritization not only helps your contractor estimate costs accurately but also allows you to allocate your resources effectively. When discussing budget with potential contractors, don’t merely look for the lowest bid. Instead, consider their overall value: how they align with your vision, their qualifications, and their communication style. An independent contractor who understands your objectives could ultimately save you money by doing the job right the first time. The Importance of References Before finalizing your contractor, ask for references from prior clients. Speaking with previous customers offers valuable insights into their experiences. Ask about communication, reliability, and quality of work. A satisfied client’s recommendation can often help alleviate concerns about moving forward. Checking Reviews and References Online reviews can also play a significant role in determining whether a contractor is the right fit for your project. Platforms like Google, Yelp, and even Facebook can give you a good idea of the contractor’s reputation. Focus on the details given in the reviews - responsiveness, quality of work, and overall satisfaction - as these can highlight their strengths and weaknesses. Getting Everything in Writing Once you decide on a contractor, it’s time to put everything in order. Ensure you have a clear, detailed contract that outlines the project scope, timeline, and payment schedule. This document provides essential protection for both you and the contractor, minimizing misunderstandings. Consider Local Expertise Especially for homeowners in southeast Michigan, hiring a contractor familiar with local building codes and styles is essential. They can navigate the regulations and even provide insight into popular home improvement trends in your area. This local knowledge can provide additional value that online-only contractors may not offer. Your Next Steps With a clearer understanding of what to look out for when hiring an independent contractor, you're better prepared to enhance your home. Remember that this is a partnership, and ensuring both sides are aligned helps tremendously. Start your project with confidence, and enjoy the transformation.

Terms of Service

Privacy Policy

Core Modal Title

Sorry, no results found

You Might Find These Articles Interesting

T
Please Check Your Email
We Will Be Following Up Shortly
*
*
*