 Add Row
  Add
Add 


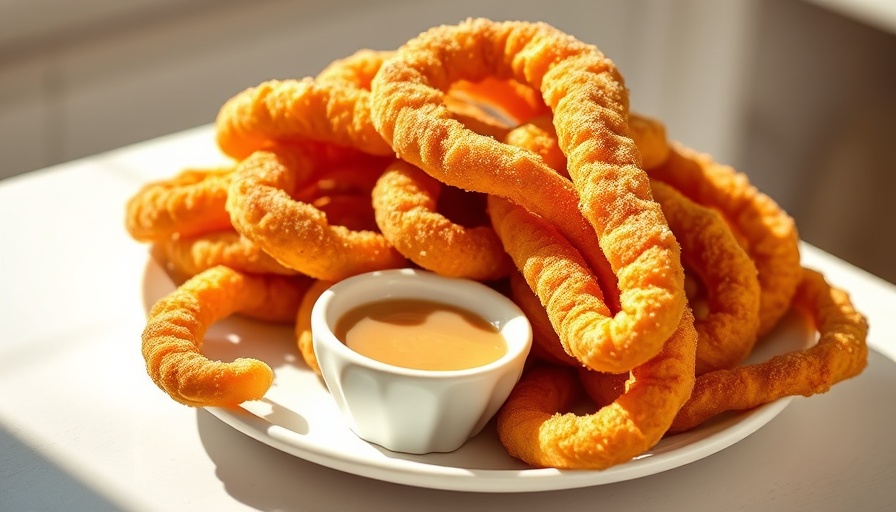
Elevate Your Cooking with Homemade Elephant Ears
Have you ever dreamt of making those delicious, sweet elephant ears right in your own kitchen? These delightful pastries, often enjoyed at fairs and carnivals, can be surprisingly simple to recreate at home. With just a few ingredients and some basic kitchen equipment, you can whip up a batch that rivals your favorite food stand.
In 'Fair-Favorite Elephant Ears Made Simple at Home', we explore how easy it is to make these delicious treats yourself, sparking a deep dive into the joys of home cooking.
A Brief History of Elephant Ears
Elephant ears, also known as funnel cakes or fried dough, have a rich history in North America. They have roots that trace back to traditional European pastries and have become a beloved fair food in the United States. The name “elephant ear” comes from their distinct, lobed shape that resembles the ears of the gentle giant. Understanding their history adds a layer of appreciation for this delightful treat.
Why Homemade is the Best Option
Making elephant ears at home isn’t just about saving money; it’s about customization. You can adjust the amount of sugar, try different toppings like cinnamon sugar or fruit preserves, and even explore gluten-free options. Plus, there’s something so comforting about cooking with family or friends, creating memories that last a lifetime.
Ingredients You’ll Need for Your Culinary Adventure
The basic ingredients for elephant ears are quite simple: flour, sugar, yeast, milk, and butter. These accessible items are staples in most kitchens. Adding cinnamon or vanilla extract can take your recipe to the next level by infusing delightful aromas that will have your loved ones eagerly anticipating the final product.
Step-by-Step Instructions for Perfect Elephant Ears
1. **Mix Ingredients:** Start by combining the flour, sugar, and yeast in a bowl. Gradually stir in warm milk to activate the yeast and form a dough.
2. **Knead the Dough:** Once your dough is formed, knead it until smooth and elastic. This step is crucial for achieving that perfect texture we all love.
3. **Let it Rise:** Allow the dough to rise in a warm place until doubled in size. This usually takes about an hour.
4. **Shape and Fry:** Roll out the dough and cut it into shapes. Heat oil in a deep pan and fry each piece until golden brown.
5. **Decorate:** As soon as they come out of the oil, sprinkle generously with sugar or top with your favorite dips!
Making Elephant Ears a Family Tradition
Imagine the joy on your children's faces as they help with rolling out the dough or sprinkling the sugar. Cooking together can be an engaging way to bond with family, encouraging teamwork and creativity. By making elephant ears a family tradition, you’re creating not only delicious treats but also lasting memories.
Exploring Healthier Alternatives
If you want to enjoy the taste of elephant ears without the guilt, consider using healthier alternatives. Swap out regular flour for whole wheat flour, and use less sugar in your dough. You can even bake instead of fry for a lighter version, and accommodate dietary restrictions with gluten-free flour blends.
What You'll Learn from Making Elephant Ears
Embarking on this culinary journey teaches valuable life skills. Patience, precision, and the joy of creating something from scratch are significant takeaways. Not just for children, these lessons provide essential skills that everyone can benefit from, ultimately fostering a sense of achievement.
With all these insights into making elephant ears at home, why not gather your loved ones and try your hand at this delightful treat? You'll not only satisfy your cravings but also create beautiful memories in your kitchen. So, roll up your sleeves, heat that oil, and let the frying begin!


 Add Row
  Add
Add 
Write A Comment