Add Row
Add Element
Southeast Michigan Home and Yard Logo
update
update
Add Element
  • Home
  • Categories
    • Home
    • Yard
    • Technology
    • News
    • Food
    • Events
    • Featured

Southeast Michigan

HOME AND YARD

  • Facebook Home and Yard Page
    update
  • update
  • update
  • update
  • update
  • update
  • update
May 06.2025
3 Minutes Read

Discover the Best Carpet Colors for Every Room in Your Home

Room showcasing popular carpet colors with modern decor.

Understanding the Impact of Carpet Colors

When thinking about home décor, the color of your carpet is just as important as choosing the right furniture or wall paint. Carpet color affects not only the visual space of a room but also the feeling it conveys. For homeowners in Southeast Michigan, understanding how different colors can impact mood, ambiance, and style is essential.

Choosing the Right Color for Each Room

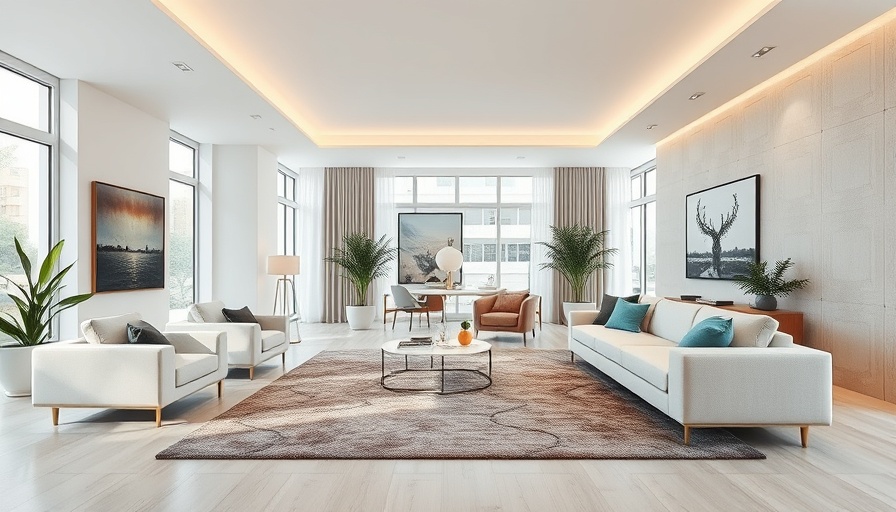
Each room in your home carries its own vibe, and selecting the appropriate carpet color can enhance that feeling. For instance, lighter shades like beige or light gray can open up your space, making small rooms feel larger. They reflect light beautifully and can help alleviate the sometimes gloomy Midwest winter days.

On the contrary, darker colors such as deep blues or charcoals can create a warm, inviting atmosphere that feels cozy — perfect for a bedroom or den where relaxation is key. If you choose this route, it’s important to balance it with adequate lighting to keep the space from feeling too heavy.

Exploring Neutral Carpet Colors: Versatility at Its Best

Neutral tones like beige, gray, and taupe are incredibly popular choices among homeowners due to their versatility. Furthermore, they complement almost any furniture and décor style. With their timeless sophistication, these colors allow you to change up your accessories and décor styles without worrying about whether your carpet matches.

  • Beige: This classic choice adds warmth and works harmoniously in traditional and cozy settings.
  • Gray: A staple in modern design, this color offers a chic look that pairs beautifully with bold accent hues.
  • Taupe: A delightful blend of beige and gray, taupe brings both warmth and elegance to any room.

Because these shades are adept at hiding dust and minor stains, they are practical choices for busy households. However, it’s worth noting that they may still show stains more than darker hues.

The Appeal of Earthy Shades: Nature-Inspired Warmth

Earthy colors like brown, green, and terracotta are perfect for those who want to bring a touch of the outdoors inside. These hues create an inviting, natural feel that pairs beautifully with wooden furniture or stone accents.

  • Brown: Offers a rich, warm look that can lend gravity and comfort to a space.
  • Green: A calming choice, green works notably in areas meant for relaxation, like a home office or bedroom.
  • Terracotta: This vibrant hue adds character and a sense of warmth, making any space feel cozier.

Using earthy tones not only promotes a natural feel but can also influence how you perceive temperature in a space — they often feel warmer than traditional colors.

Incorporating Bold Colors: Adding Personality to Your Home

If you're looking to make a statement, consider using bold colors like ruby red, vibrant blue, or sunny yellow for accent areas. These tones can energize a space and show off your personality. Just be cautious to keep the bold color limited to smaller areas or as accent pieces — like runners in a hallway or area rugs in a living room — to prevent overwhelming your space.

Best Practices for Selecting Carpet Colors for High-Traffic Areas

For busy areas in your home, it is advisable to choose carpet colors that are stain-resistant and can withstand daily wear and tear. Darker shades generally do better in handling life's spills and dirt. In addition, trying pet-friendly options could also be a smart choice for those sharing their space with four-legged friends.

Final Thoughts: Elevating Your Home's Aesthetic

A well-chosen carpet does more than just serve as flooring; it can enhance your home's overall value and ambiance. Whether you go for neutral tones, earthy shades, or bold colors, the right carpet color can create a welcoming, stylish environment that reflects your personality.

Ready to transform your space? Visit your local home improvement store or consult with an interior design professional to explore options that resonate with your style and meet your practical needs. Color choice can significantly influence not only how your home looks but how it feels — so choose wisely!

Home

Write A Comment

*
*
Related Posts All Posts
07.20.2025

Are Car Night Vision Cameras Worth It? Explore Their Safety Benefits

Update Are Car Night Vision Cameras the Future of Road Safety? If you've ever driven at night and wished for a clearer view, you might have heard about car night vision cameras. These high-tech gadgets are gaining traction in modern cars, particularly luxurious ones. But are they really worth the investment? Let's dive deeper into what they offer. Understanding How Night Vision Cameras Work Car night vision cameras, like the ones offered by Mercedes-Benz, use infrared technology to enhance visibility in low-light conditions. They provide a live feed of the dark road ahead, indicating the presence of pedestrians and other potential hazards. Unlike traditional cameras that rely on visible light, night vision systems can detect objects that emit heat, which allows them to spot pedestrians up to 80 meters away. This precision aims to give drivers advanced warning of obstacles that may be hidden in the shadows. Comparing Different Car Brands Offering Night Vision Several manufacturers, including Toyota, BMW, Lexus, and Cadillac, are now integrating night vision cameras into their vehicles. If you're not in the market for a luxury car, fear not! There are also affordable after-market options available for those keen to upgrade their current vehicle with this technology. Are Night Vision Cameras Truly Beneficial? While the technology may seem beneficial, not everyone agrees on its effectiveness. On one hand, night vision cameras can aid in accident prevention by illuminating otherwise unseen hazards. But on the other hand, industry experts like those at Kelley Blue Book caution that their utility can vary based on several factors including your driving environment and conditions. For instance, in warmer climates, ambient temperature can hinder the system's ability to detect objects accurately. Limitations and Challenges of Night Vision Technology Even with advancements in night vision technology, there are limitations. Infrared cameras may struggle with some inanimate objects like road barriers and debris, making it necessary for drivers to remain vigilant. Additionally, severe weather conditions such as rain, snow, or fog can impair the system's performance. Thus, relying solely on this technology for optimal safety might not be the best strategy. Making an Informed Decision Purchasing a vehicle equipped with night vision capabilities should come down to personal preference and driving style. Ask yourself: do you often drive at night? Are you comfortable with new technology? Understanding how this system complements your driving habits can help you decide if it's a worthwhile investment. A Look Ahead: Future Developments As technology advances, we can expect night vision systems to improve in effectiveness and affordability. This innovation may lead to even better road safety measures, reducing the number of accidents on our busy roads. In conclusion, while car night vision cameras can offer enhanced safety features, their effectiveness largely depends on individual driving environments and conditions. Consider your usual driving habits when making your decision. If you’re intrigued by the potential of your vehicle’s technology, take the time to learn more about how these cameras can be integrated into your driving experience. That way, you can fully harness the benefits they may offer!

07.18.2025

Quick DIY Tips to Repair Vinyl Plank Flooring Like a Pro

Update Understanding Vinyl Plank Flooring Care Vinyl plank flooring, a popular choice among homeowners in Southeast Michigan, is lauded for its durability and aesthetic appeal. However, like any flooring material, it can suffer from wear and tear over time. Knowing how to care for and repair your vinyl planks can extend their life significantly, keeping your home looking sharp and fresh. Essential Tools and Materials for Repairing Vinyl Plank Flooring When it comes to fixing your vinyl flooring, having the right tools is essential. Here’s what you need: Chisel Circular saw Hammer Oscillating saw with plunge blade Pencil Pry bar Pull bar Rubber mallet Straightedge Utility knife Finish nails Replacement plank Superglue Gathering these will set you up for success! Method 1: Replace a Damaged Plank with Ease High-quality vinyl planks are designed for easy repairs, especially when it comes to replacing a damaged plank. Follow these steps to replace a plank: Remove the baseboard: Carefully score the top edge with a utility knife to break the bond with the wall paint. Gently remove the baseboard using a hammer and pry bar. Pry up the damaged floor: Begin at the corner where the last piece was installed, using your pry bar to pop it up. This process is usually straightforward in smaller rooms but may require professional help in larger spaces. This method maintains the integrity of your floating floor and ensures a seamless look after the repair. Alternative Repair Method: Glue Down If your flooring isn’t of high quality and can’t be unclicked, a glue-down technique can be used. However, this approach changes your flooring style from floating to glued down, which might lead to issues later on: Cut out the damaged plank carefully. Modify your replacement piece to fit snugly. Apply superglue and set the plank in place. While not ideal, this quick fix might get you through until you can replace the flooring entirely. Future Care Insights: Keeping Your Vinyl Flooring Pristine To avoid needing repairs in the future, ensure you maintain your vinyl flooring diligently. Regular cleaning using non-abrasive cleaners and protective mats in high-traffic areas can greatly reduce wear. Knowing how to repair your vinyl plank flooring not only saves time but also keeps your home looking its best. While some jobs can be handled as a DIY project, always consider the size and complexity of the task at hand. Ultimately, balancing DIY repairs with professional help ensures longevity and quality in your home improvement projects.

07.17.2025

Master Heat Pump Thermostat Wiring: A DIY Guide for Homeowners

Update Understanding Heat Pump Thermostat Wiring Wiring a heat pump thermostat may sound intimidating, but it's a task that many homeowners in Southeast Michigan can tackle on their own. With a few simple tools and a bit of guidance, you can upgrade your HVAC system’s functionality and efficiency by replacing that old thermostat. Essential Tools and Materials Before diving into wiring, gather the necessary tools: Marker for labeling Non-contact voltage tester Phillips and flathead screwdrivers Wire strippers You'll also need a new heat pump thermostat, electrical tape or masking tape, and mounting screws. Having everything in one place will make the process much smoother. Step-by-Step Instruction for Wiring Your New Thermostat Ready to replace that old thermostat? Follow these simple steps: 1. Turn Off the Power The first and most crucial step is ensuring your safety. Locate the disconnect switch for your HVAC system or turn off the circuit breaker to prevent any electrical mishaps. Remember, safety first! 2. Verify the Wiring Next, carefully remove the existing thermostat's faceplate. Use your non-contact voltage tester to confirm that no power is flowing to the thermostat. Take a photograph of the existing wiring so that you can easily replicate the setup. 3. Remove the Old Thermostat Gently remove the wires from the terminal block, labeling them with pieces of tape if desired. Once all wires are detached, unscrew the thermostat from the wall and set it aside. 4. Attach the New Thermostat Thread the thermostat wires through the base of your new thermostat. Level it on the wall and secure it with the provided screws. Then, attach the wires to their respective terminals as noted in your earlier photo. Common Misconceptions About Thermostat Wiring One might think that thermostat wiring is a task only for professionals, but that's a misconception. Many homeowners are perfectly capable of wiring their thermostats, provided they follow clear instructions. Dismissing DIY projects denies you the chance to save money and gain new skills! The Value of Tackling This DIY Project Replacing your thermostat can significantly enhance your home's heating efficiency. A modern, smart thermostat could lead to energy savings and greater control over your home's environment. It’s a relatively inexpensive upgrade that pays dividends in comfort and energy costs! Why Knowing This Information Matters For homeowners in Southeast Michigan, understanding how to wire your heat pump thermostat can empower you to make quick fixes yourself, fostering a more self-sufficient lifestyle. Not only does this enhance your home, but it also builds confidence in managing your property’s upkeep. Now, are you feeling more confident about taking on this thermostat wiring task? If you enjoy DIY projects around the house, keep learning and trying new things. Remember, if ever all else fails, there’s no shame in calling in a professional!

Terms of Service

Privacy Policy

Core Modal Title

Sorry, no results found

You Might Find These Articles Interesting

T
Please Check Your Email
We Will Be Following Up Shortly
*
*
*