Add Row
Add Element
Southeast Michigan Home and Yard Logo
update
update
Add Element
  • Home
  • Categories
    • Home
    • Yard
    • Technology
    • News
    • Food
    • Events
    • Featured

Southeast Michigan

HOME AND YARD

  • Facebook Home and Yard Page
    update
  • update
  • update
  • update
  • update
  • update
  • update
April 27.2025
3 Minutes Read

Master the Art of Handwashing: Essential Tips for Homeowners

Effective DIY handwashing techniques shown with soap and water.

Why Proper Handwashing is Essential for Homeowners

When it comes to maintaining a healthy home environment, clean hands are not just a hygiene practice; they are a necessity. Homeowners in Southeast Michigan face unique challenges, from winter's harsh chemicals to the everyday dirt and grime of home improvement projects. According to dermatologist Dr. Stephanie Taylor, proper handwashing is the simplest method for preventing illness. "Our hands transport germs from various surfaces, and one effective wash can be quite the barrier against infections," she emphasizes.

The Danger Lurking in Your Home Projects

Consider the implications of a DIY project gone wrong. Each weekend spent in the garage or yard can inadvertently endanger your skin's health and your overall well-being if hands aren't washed properly. "Grime, bacteria, and harmful chemicals can easily transfer to your skin, leading to irritations or infections," says Dr. David Johnson. Make sure to wash thoroughly after engaging in any home mechanics or crafting activities to protect your hands.

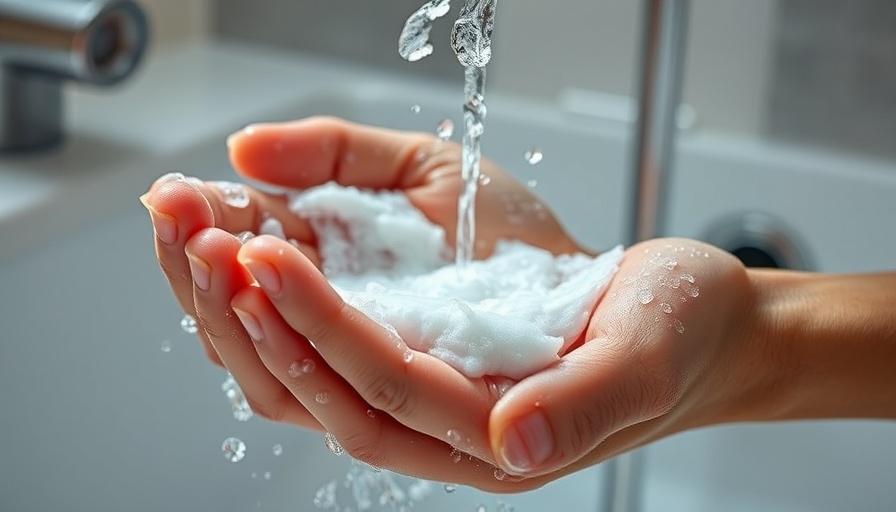
Step-by-Step Guide to Effective Handwashing

The correct way to wash your hands can be boiled down to a few simple steps. Turn on clean, running water and wet your hands. Apply soap generously to create a good lather, rubbing your hands together for about 20 seconds. Don't forget areas like the back of your hands and between your fingers. Rinse all soap off and dry with a clean towel. For those and similar hands-on tasks, specific soaps can enhance cleanliness. Heavy-duty soaps with pumice work effectively on grease, while mild soaps are best for daily washing.

Choosing the Right Soap for the Job

Picking the right soap can make all the difference. For a task with lots of sticky dirt and grease, opt for a heavy-duty soap like Gojo or Fast Orange, which can handle tough messes without overly irritating the skin. On the other hand, if you're using oil-based paints, a mineral spirit is necessary to dissolve those greases. The key is to always finish with a gentle soap and a moisturizer to protect your hands further.

The Importance of Moisturizing After Washing

Even with the best soaps, frequent washing can lead to dry and cracked skin. After you have effectively cleaned your hands, applying a thick hand cream sustains hydration and protects your skin barrier. Products like Eucerin Advanced Repair are recommended for their ability to replenish moisture and heal dry skin conditions. Consistently moisturizing not only benefits your skin but ensures that your hands remain healthy and ready for any task ahead.

Common Misconceptions About Handwashing

It’s easy to think that a quick rinse is adequate, but many assume that they can skip parts of washing like between fingers and under nails. This is a dangerous misconception! Dr. Taylor reminds us, "If every part of your hand is not cleaned, bacteria will survive and continue to pose risks to your health." Everyone must dedicate proper time to washing.

Final Thoughts: Protect Yourself With Handwashing

Investing time in acquiring the correct handwashing technique means investing in your health. Homeowners across Southeast Michigan have unique considerations, but washing hands correctly transcends posts and properties. Proper habits will equip you for all your home DIY endeavors. Remember, good health starts with good habits, so scrub those hands and keep them clean.

The handwashing tips provided will go a long way in ensuring a safer, healthier home. If you haven't already, take the time to reassess your handwashing techniques. It's simply one of the best preventive measures you can take right now.

Home

Write A Comment

*
*
Related Posts All Posts
07.18.2025

Quick DIY Tips to Repair Vinyl Plank Flooring Like a Pro

Update Understanding Vinyl Plank Flooring Care Vinyl plank flooring, a popular choice among homeowners in Southeast Michigan, is lauded for its durability and aesthetic appeal. However, like any flooring material, it can suffer from wear and tear over time. Knowing how to care for and repair your vinyl planks can extend their life significantly, keeping your home looking sharp and fresh. Essential Tools and Materials for Repairing Vinyl Plank Flooring When it comes to fixing your vinyl flooring, having the right tools is essential. Here’s what you need: Chisel Circular saw Hammer Oscillating saw with plunge blade Pencil Pry bar Pull bar Rubber mallet Straightedge Utility knife Finish nails Replacement plank Superglue Gathering these will set you up for success! Method 1: Replace a Damaged Plank with Ease High-quality vinyl planks are designed for easy repairs, especially when it comes to replacing a damaged plank. Follow these steps to replace a plank: Remove the baseboard: Carefully score the top edge with a utility knife to break the bond with the wall paint. Gently remove the baseboard using a hammer and pry bar. Pry up the damaged floor: Begin at the corner where the last piece was installed, using your pry bar to pop it up. This process is usually straightforward in smaller rooms but may require professional help in larger spaces. This method maintains the integrity of your floating floor and ensures a seamless look after the repair. Alternative Repair Method: Glue Down If your flooring isn’t of high quality and can’t be unclicked, a glue-down technique can be used. However, this approach changes your flooring style from floating to glued down, which might lead to issues later on: Cut out the damaged plank carefully. Modify your replacement piece to fit snugly. Apply superglue and set the plank in place. While not ideal, this quick fix might get you through until you can replace the flooring entirely. Future Care Insights: Keeping Your Vinyl Flooring Pristine To avoid needing repairs in the future, ensure you maintain your vinyl flooring diligently. Regular cleaning using non-abrasive cleaners and protective mats in high-traffic areas can greatly reduce wear. Knowing how to repair your vinyl plank flooring not only saves time but also keeps your home looking its best. While some jobs can be handled as a DIY project, always consider the size and complexity of the task at hand. Ultimately, balancing DIY repairs with professional help ensures longevity and quality in your home improvement projects.

07.17.2025

Master Heat Pump Thermostat Wiring: A DIY Guide for Homeowners

Update Understanding Heat Pump Thermostat Wiring Wiring a heat pump thermostat may sound intimidating, but it's a task that many homeowners in Southeast Michigan can tackle on their own. With a few simple tools and a bit of guidance, you can upgrade your HVAC system’s functionality and efficiency by replacing that old thermostat. Essential Tools and Materials Before diving into wiring, gather the necessary tools: Marker for labeling Non-contact voltage tester Phillips and flathead screwdrivers Wire strippers You'll also need a new heat pump thermostat, electrical tape or masking tape, and mounting screws. Having everything in one place will make the process much smoother. Step-by-Step Instruction for Wiring Your New Thermostat Ready to replace that old thermostat? Follow these simple steps: 1. Turn Off the Power The first and most crucial step is ensuring your safety. Locate the disconnect switch for your HVAC system or turn off the circuit breaker to prevent any electrical mishaps. Remember, safety first! 2. Verify the Wiring Next, carefully remove the existing thermostat's faceplate. Use your non-contact voltage tester to confirm that no power is flowing to the thermostat. Take a photograph of the existing wiring so that you can easily replicate the setup. 3. Remove the Old Thermostat Gently remove the wires from the terminal block, labeling them with pieces of tape if desired. Once all wires are detached, unscrew the thermostat from the wall and set it aside. 4. Attach the New Thermostat Thread the thermostat wires through the base of your new thermostat. Level it on the wall and secure it with the provided screws. Then, attach the wires to their respective terminals as noted in your earlier photo. Common Misconceptions About Thermostat Wiring One might think that thermostat wiring is a task only for professionals, but that's a misconception. Many homeowners are perfectly capable of wiring their thermostats, provided they follow clear instructions. Dismissing DIY projects denies you the chance to save money and gain new skills! The Value of Tackling This DIY Project Replacing your thermostat can significantly enhance your home's heating efficiency. A modern, smart thermostat could lead to energy savings and greater control over your home's environment. It’s a relatively inexpensive upgrade that pays dividends in comfort and energy costs! Why Knowing This Information Matters For homeowners in Southeast Michigan, understanding how to wire your heat pump thermostat can empower you to make quick fixes yourself, fostering a more self-sufficient lifestyle. Not only does this enhance your home, but it also builds confidence in managing your property’s upkeep. Now, are you feeling more confident about taking on this thermostat wiring task? If you enjoy DIY projects around the house, keep learning and trying new things. Remember, if ever all else fails, there’s no shame in calling in a professional!

07.17.2025

What Homeowners in Michigan Need to Know When Hiring Contractors

Update Understanding Your Home Renovation Needs With more time spent indoors than ever, many of us have started thinking creatively about our living spaces. Whether it's a cozy nook or a full kitchen remodel, home renovations have seen a significant uptick. However, tackling these projects can overwhelm anyone. That’s where hiring the right independent contractor comes in, ensuring your vision becomes a reality without the headaches. Are They Qualified to Transform Your Space? The crucial first step in hiring an independent contractor is verifying their qualifications. While stepping into a new renovation might sound exciting, it's vital that your contractor is well-equipped for the job. An excellent way to gauge this is through their online presence. Review their website showcasing past projects, client testimonials, and qualifications. This will provide insights into their capability and professionalism. In addition to their website, social media platforms can offer a glimpse into their recent works and client interactions. Homeowners might find comfort in seeing how a contractor handles feedback. Essentially, don’t shy away from asking them about their licenses and training. Licensed contractors typically carry a sense of commitment and professionalism that can minimize your worries during the renovation process. Do They Align with Your Vision? After confirming they are qualified, it's crucial to find out if they see the world the same way you do. A great contractor will invest time in understanding your vision. They should be eager and able to visualize the bigger picture of your desires, whether it’s an open concept kitchen or a luxurious spa-like bathroom. Discuss your ideas openly – whether inspired by designs from Pinterest or recent home improvement shows. The goal is a healthy collaboration, ensuring both parties are on the same page before diving into the project. Budgeting: What Can You Afford? Budgeting for renovations can be daunting but breaking it down can help ease the burden. Make a list of priorities for your home transformation. You might want to transform your kitchen today, while a new bathroom can wait. This prioritization not only helps your contractor estimate costs accurately but also allows you to allocate your resources effectively. When discussing budget with potential contractors, don’t merely look for the lowest bid. Instead, consider their overall value: how they align with your vision, their qualifications, and their communication style. An independent contractor who understands your objectives could ultimately save you money by doing the job right the first time. The Importance of References Before finalizing your contractor, ask for references from prior clients. Speaking with previous customers offers valuable insights into their experiences. Ask about communication, reliability, and quality of work. A satisfied client’s recommendation can often help alleviate concerns about moving forward. Checking Reviews and References Online reviews can also play a significant role in determining whether a contractor is the right fit for your project. Platforms like Google, Yelp, and even Facebook can give you a good idea of the contractor’s reputation. Focus on the details given in the reviews - responsiveness, quality of work, and overall satisfaction - as these can highlight their strengths and weaknesses. Getting Everything in Writing Once you decide on a contractor, it’s time to put everything in order. Ensure you have a clear, detailed contract that outlines the project scope, timeline, and payment schedule. This document provides essential protection for both you and the contractor, minimizing misunderstandings. Consider Local Expertise Especially for homeowners in southeast Michigan, hiring a contractor familiar with local building codes and styles is essential. They can navigate the regulations and even provide insight into popular home improvement trends in your area. This local knowledge can provide additional value that online-only contractors may not offer. Your Next Steps With a clearer understanding of what to look out for when hiring an independent contractor, you're better prepared to enhance your home. Remember that this is a partnership, and ensuring both sides are aligned helps tremendously. Start your project with confidence, and enjoy the transformation.

Terms of Service

Privacy Policy

Core Modal Title

Sorry, no results found

You Might Find These Articles Interesting

T
Please Check Your Email
We Will Be Following Up Shortly
*
*
*