Add Row
Add Element
Southeast Michigan Home and Yard Logo
update
update
Add Element
  • Home
  • Categories
    • Home
    • Yard
    • Technology
    • News
    • Food
    • Events
    • Featured

Southeast Michigan

HOME AND YARD

  • Facebook Home and Yard Page
    update
  • update
  • update
  • update
  • update
  • update
  • update
May 17.2025
3 Minutes Read

Navigating Doggy Door Safety: Smart Strategies for Homeowners

Small dog using a doggy door safely on a tiled patio.

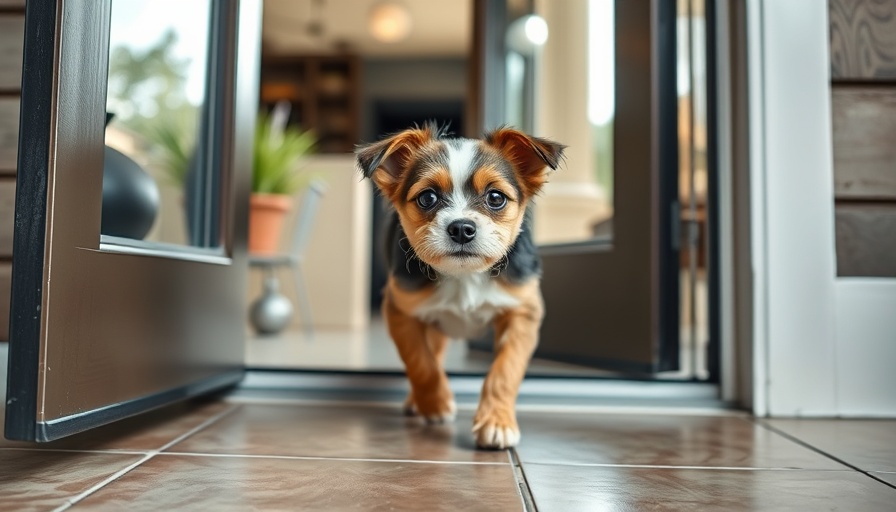
Assessing the Safety of Doggy Doors: A Homeowner's Guide

For many homeowners, especially those living in Southeast Michigan, adding a doggy door can seem like an easy solution to enhance pet convenience while managing home life seamlessly. However, it’s essential to weigh the advantages against potential safety and security risks. Are doggy doors truly safe? Let’s unpack this common query.

Understanding the Security Risks

Doggy doors, while convenient, can pose significant security risks. Visibility is a primary concern: if a dog door is located in an area easily seen from the street, it may attract unwelcome attention. As Sara Harshbarger, a security expert, highlights, burglars are often opportunists and may use an unlocked dog door as a way to gain access to your home.

Moreover, the size of the door matters immensely. If it’s large enough for an average-sized person, it can become a simple entry point for those with ill intentions. Additionally, Kirk MacDowell, a home security advisor, points out that cutting a hole in a door compromises its overall integrity, making your home vulnerable.

Choosing Wisely: Location, Type, and Size

When it comes to doggy doors, homeowners can implement a few key strategies to enhance security:

  • Pick the Right Location: Install your dog door in a discreet area. A wall installation in a less visible spot, like a side alley, is beneficial compared to positioning it on a front door, which is a common access point for burglars.
  • Choose the Right Type of Door: Select a lockable dog door model with advanced features like automatic or electronic capabilities that respond only to your pet's collar or microchip. Not only do these models enhance security against unauthorized entry, but they also keep pests at bay.
  • Measure for the Perfect Fit: The size of the dog door is crucial. A door that accommodates your pet snugly will prevent outsiders from squeezing through.

Lock It Up After Use!

Another essential tip is to remember to lock the pet door when not in use. Security is heightened when there’s not a constant opening for uninvited guests to slip through, making home safety a priority.

Balancing Convenience and Security

While the allure of a doggy door is high due to the convenience it offers both pets and homeowners alike, maintaining security is vital. Given that most burglaries occur through windows or main doors, a dog door can actually become a deterrent in some cases—if strategically placed and secured—with dogs that alert their owners to unusual activity by barking.

Ultimately, ensuring your home remains secure while accommodating your furry friend requires thoughtful consideration. With the right strategies, homeowners in Southeast Michigan can enjoy the benefits of a dog door without fear of compromising their safety.

Final Thoughts: Can You DIY Your Doggy Door?

If balancing pet convenience and home security sounds challenging, consider whether installing a doggy door is a DIY project or if professional help is warranted. As someone passionate about home improvement, I’m excited to help others tackle such projects while recommending professional intervention when necessary. It’s all about ensuring you make informed and safe decisions for your home and pets.

Home

Write A Comment

*
*
Related Posts All Posts
07.20.2025

Are Car Night Vision Cameras Worth It? Explore Their Safety Benefits

Update Are Car Night Vision Cameras the Future of Road Safety? If you've ever driven at night and wished for a clearer view, you might have heard about car night vision cameras. These high-tech gadgets are gaining traction in modern cars, particularly luxurious ones. But are they really worth the investment? Let's dive deeper into what they offer. Understanding How Night Vision Cameras Work Car night vision cameras, like the ones offered by Mercedes-Benz, use infrared technology to enhance visibility in low-light conditions. They provide a live feed of the dark road ahead, indicating the presence of pedestrians and other potential hazards. Unlike traditional cameras that rely on visible light, night vision systems can detect objects that emit heat, which allows them to spot pedestrians up to 80 meters away. This precision aims to give drivers advanced warning of obstacles that may be hidden in the shadows. Comparing Different Car Brands Offering Night Vision Several manufacturers, including Toyota, BMW, Lexus, and Cadillac, are now integrating night vision cameras into their vehicles. If you're not in the market for a luxury car, fear not! There are also affordable after-market options available for those keen to upgrade their current vehicle with this technology. Are Night Vision Cameras Truly Beneficial? While the technology may seem beneficial, not everyone agrees on its effectiveness. On one hand, night vision cameras can aid in accident prevention by illuminating otherwise unseen hazards. But on the other hand, industry experts like those at Kelley Blue Book caution that their utility can vary based on several factors including your driving environment and conditions. For instance, in warmer climates, ambient temperature can hinder the system's ability to detect objects accurately. Limitations and Challenges of Night Vision Technology Even with advancements in night vision technology, there are limitations. Infrared cameras may struggle with some inanimate objects like road barriers and debris, making it necessary for drivers to remain vigilant. Additionally, severe weather conditions such as rain, snow, or fog can impair the system's performance. Thus, relying solely on this technology for optimal safety might not be the best strategy. Making an Informed Decision Purchasing a vehicle equipped with night vision capabilities should come down to personal preference and driving style. Ask yourself: do you often drive at night? Are you comfortable with new technology? Understanding how this system complements your driving habits can help you decide if it's a worthwhile investment. A Look Ahead: Future Developments As technology advances, we can expect night vision systems to improve in effectiveness and affordability. This innovation may lead to even better road safety measures, reducing the number of accidents on our busy roads. In conclusion, while car night vision cameras can offer enhanced safety features, their effectiveness largely depends on individual driving environments and conditions. Consider your usual driving habits when making your decision. If you’re intrigued by the potential of your vehicle’s technology, take the time to learn more about how these cameras can be integrated into your driving experience. That way, you can fully harness the benefits they may offer!

07.18.2025

Quick DIY Tips to Repair Vinyl Plank Flooring Like a Pro

Update Understanding Vinyl Plank Flooring Care Vinyl plank flooring, a popular choice among homeowners in Southeast Michigan, is lauded for its durability and aesthetic appeal. However, like any flooring material, it can suffer from wear and tear over time. Knowing how to care for and repair your vinyl planks can extend their life significantly, keeping your home looking sharp and fresh. Essential Tools and Materials for Repairing Vinyl Plank Flooring When it comes to fixing your vinyl flooring, having the right tools is essential. Here’s what you need: Chisel Circular saw Hammer Oscillating saw with plunge blade Pencil Pry bar Pull bar Rubber mallet Straightedge Utility knife Finish nails Replacement plank Superglue Gathering these will set you up for success! Method 1: Replace a Damaged Plank with Ease High-quality vinyl planks are designed for easy repairs, especially when it comes to replacing a damaged plank. Follow these steps to replace a plank: Remove the baseboard: Carefully score the top edge with a utility knife to break the bond with the wall paint. Gently remove the baseboard using a hammer and pry bar. Pry up the damaged floor: Begin at the corner where the last piece was installed, using your pry bar to pop it up. This process is usually straightforward in smaller rooms but may require professional help in larger spaces. This method maintains the integrity of your floating floor and ensures a seamless look after the repair. Alternative Repair Method: Glue Down If your flooring isn’t of high quality and can’t be unclicked, a glue-down technique can be used. However, this approach changes your flooring style from floating to glued down, which might lead to issues later on: Cut out the damaged plank carefully. Modify your replacement piece to fit snugly. Apply superglue and set the plank in place. While not ideal, this quick fix might get you through until you can replace the flooring entirely. Future Care Insights: Keeping Your Vinyl Flooring Pristine To avoid needing repairs in the future, ensure you maintain your vinyl flooring diligently. Regular cleaning using non-abrasive cleaners and protective mats in high-traffic areas can greatly reduce wear. Knowing how to repair your vinyl plank flooring not only saves time but also keeps your home looking its best. While some jobs can be handled as a DIY project, always consider the size and complexity of the task at hand. Ultimately, balancing DIY repairs with professional help ensures longevity and quality in your home improvement projects.

07.17.2025

Master Heat Pump Thermostat Wiring: A DIY Guide for Homeowners

Update Understanding Heat Pump Thermostat Wiring Wiring a heat pump thermostat may sound intimidating, but it's a task that many homeowners in Southeast Michigan can tackle on their own. With a few simple tools and a bit of guidance, you can upgrade your HVAC system’s functionality and efficiency by replacing that old thermostat. Essential Tools and Materials Before diving into wiring, gather the necessary tools: Marker for labeling Non-contact voltage tester Phillips and flathead screwdrivers Wire strippers You'll also need a new heat pump thermostat, electrical tape or masking tape, and mounting screws. Having everything in one place will make the process much smoother. Step-by-Step Instruction for Wiring Your New Thermostat Ready to replace that old thermostat? Follow these simple steps: 1. Turn Off the Power The first and most crucial step is ensuring your safety. Locate the disconnect switch for your HVAC system or turn off the circuit breaker to prevent any electrical mishaps. Remember, safety first! 2. Verify the Wiring Next, carefully remove the existing thermostat's faceplate. Use your non-contact voltage tester to confirm that no power is flowing to the thermostat. Take a photograph of the existing wiring so that you can easily replicate the setup. 3. Remove the Old Thermostat Gently remove the wires from the terminal block, labeling them with pieces of tape if desired. Once all wires are detached, unscrew the thermostat from the wall and set it aside. 4. Attach the New Thermostat Thread the thermostat wires through the base of your new thermostat. Level it on the wall and secure it with the provided screws. Then, attach the wires to their respective terminals as noted in your earlier photo. Common Misconceptions About Thermostat Wiring One might think that thermostat wiring is a task only for professionals, but that's a misconception. Many homeowners are perfectly capable of wiring their thermostats, provided they follow clear instructions. Dismissing DIY projects denies you the chance to save money and gain new skills! The Value of Tackling This DIY Project Replacing your thermostat can significantly enhance your home's heating efficiency. A modern, smart thermostat could lead to energy savings and greater control over your home's environment. It’s a relatively inexpensive upgrade that pays dividends in comfort and energy costs! Why Knowing This Information Matters For homeowners in Southeast Michigan, understanding how to wire your heat pump thermostat can empower you to make quick fixes yourself, fostering a more self-sufficient lifestyle. Not only does this enhance your home, but it also builds confidence in managing your property’s upkeep. Now, are you feeling more confident about taking on this thermostat wiring task? If you enjoy DIY projects around the house, keep learning and trying new things. Remember, if ever all else fails, there’s no shame in calling in a professional!

Terms of Service

Privacy Policy

Core Modal Title

Sorry, no results found

You Might Find These Articles Interesting

T
Please Check Your Email
We Will Be Following Up Shortly
*
*
*