Add Row
Add Element
Southeast Michigan Home and Yard Logo
update
update
Add Element
  • Home
  • Categories
    • Home
    • Yard
    • Technology
    • News
    • Food
    • Events
    • Featured

Southeast Michigan

HOME AND YARD

  • Facebook Home and Yard Page
    update
  • update
  • update
  • update
  • update
  • update
  • update
April 18.2025
2 Minutes Read

Unlock the Secrets: How Long Does It Take to Build a Barndominium?

Modern barndominium construction under clear sky.

The Allure of Barndominiums: Why They're Gaining Popularity

Barndominiums are the ideal fusion of rustic charm and modern functionality. With their spacious interiors and often cost-effective construction, these hybrid buildings appeal to many homeowners, especially in rural areas of Southeast Michigan. These structures provide an opportunity for customization, making them a go-to for anyone looking to escape the typical suburban home.

Understanding the Barndominium Construction Timeline

Typically, the time it takes to build a barndominium can range from a few months to over a year. This timeline depends largely on several factors. From securing permits to selecting the right materials, each stage can introduce variables that may either expedite or delay the process.

Breaking Down the Stages of Construction

The construction of a barndominium is typically segmented into a few critical phases:

  • Planning and Design: Before any nails are hammered, a solid plan and design layout must be in place. This includes everything from blueprints to material selection, which can take a few weeks to finalize.
  • Site Preparation: Once the design is set, the site must be cleared and prepared. This stage may encompass land grading, utility installation, and foundation work.
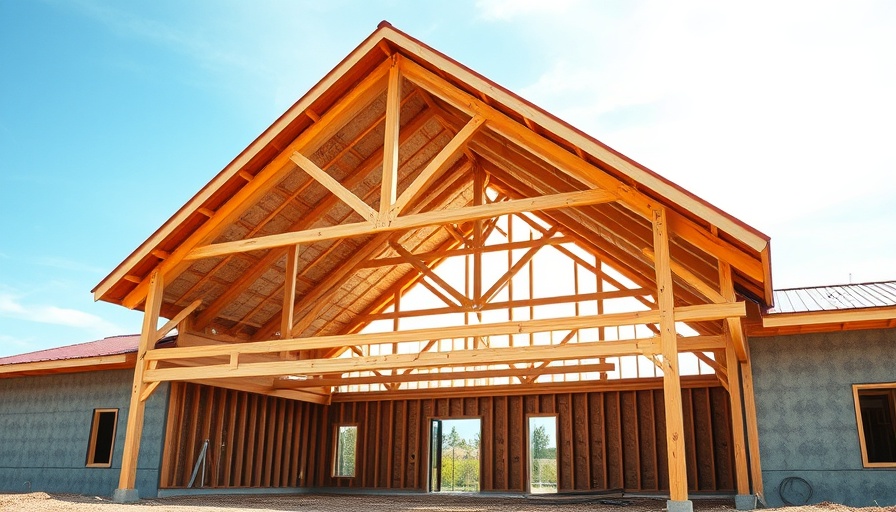
  • Framing and Structure: With the foundation in place, it's time for framing. This step is where the unique barn-style architecture begins to take shape, typically lasting several weeks.
  • Interior Finishing: How you finish the interior of your barndominium can significantly impact the overall time. DIY enthusiasts may opt for a longer timeline to personalize their home, while hiring professionals can speed up the process.

Factors Influencing Build Time

Some main factors affecting build time include:

  • Permits and Regulations: Securing building permits can sometimes be a lengthy process, depending on local regulations in Southeast Michigan.
  • Weather Conditions: Because barndominiums are often built in rural areas, unpredictable weather can also stall outdoor construction activities.
  • Material Availability: With supply chain issues being prevalent, the availability of desired materials can lengthen or shorten the timeline.

Benefits of Building Your Own Barndominium

Building a barndominium not only allows for creativity and personalization but also can be an attractive financial investment. With proper planning, these structures often yield a higher resale value than traditional homes, particularly for those drawn to the allure of rural living.

Conclusion and Next Steps

Embarking on the journey to build a barndominium can be immensely rewarding if you understand the timeline and variables involved. To equip yourself with knowledge and insights for your project, consider subscribing to our newsletter for tips on barndominium construction and maintenance updates.

Home

Write A Comment

*
*
Related Posts All Posts
07.18.2025

Quick DIY Tips to Repair Vinyl Plank Flooring Like a Pro

Update Understanding Vinyl Plank Flooring Care Vinyl plank flooring, a popular choice among homeowners in Southeast Michigan, is lauded for its durability and aesthetic appeal. However, like any flooring material, it can suffer from wear and tear over time. Knowing how to care for and repair your vinyl planks can extend their life significantly, keeping your home looking sharp and fresh. Essential Tools and Materials for Repairing Vinyl Plank Flooring When it comes to fixing your vinyl flooring, having the right tools is essential. Here’s what you need: Chisel Circular saw Hammer Oscillating saw with plunge blade Pencil Pry bar Pull bar Rubber mallet Straightedge Utility knife Finish nails Replacement plank Superglue Gathering these will set you up for success! Method 1: Replace a Damaged Plank with Ease High-quality vinyl planks are designed for easy repairs, especially when it comes to replacing a damaged plank. Follow these steps to replace a plank: Remove the baseboard: Carefully score the top edge with a utility knife to break the bond with the wall paint. Gently remove the baseboard using a hammer and pry bar. Pry up the damaged floor: Begin at the corner where the last piece was installed, using your pry bar to pop it up. This process is usually straightforward in smaller rooms but may require professional help in larger spaces. This method maintains the integrity of your floating floor and ensures a seamless look after the repair. Alternative Repair Method: Glue Down If your flooring isn’t of high quality and can’t be unclicked, a glue-down technique can be used. However, this approach changes your flooring style from floating to glued down, which might lead to issues later on: Cut out the damaged plank carefully. Modify your replacement piece to fit snugly. Apply superglue and set the plank in place. While not ideal, this quick fix might get you through until you can replace the flooring entirely. Future Care Insights: Keeping Your Vinyl Flooring Pristine To avoid needing repairs in the future, ensure you maintain your vinyl flooring diligently. Regular cleaning using non-abrasive cleaners and protective mats in high-traffic areas can greatly reduce wear. Knowing how to repair your vinyl plank flooring not only saves time but also keeps your home looking its best. While some jobs can be handled as a DIY project, always consider the size and complexity of the task at hand. Ultimately, balancing DIY repairs with professional help ensures longevity and quality in your home improvement projects.

07.17.2025

Master Heat Pump Thermostat Wiring: A DIY Guide for Homeowners

Update Understanding Heat Pump Thermostat Wiring Wiring a heat pump thermostat may sound intimidating, but it's a task that many homeowners in Southeast Michigan can tackle on their own. With a few simple tools and a bit of guidance, you can upgrade your HVAC system’s functionality and efficiency by replacing that old thermostat. Essential Tools and Materials Before diving into wiring, gather the necessary tools: Marker for labeling Non-contact voltage tester Phillips and flathead screwdrivers Wire strippers You'll also need a new heat pump thermostat, electrical tape or masking tape, and mounting screws. Having everything in one place will make the process much smoother. Step-by-Step Instruction for Wiring Your New Thermostat Ready to replace that old thermostat? Follow these simple steps: 1. Turn Off the Power The first and most crucial step is ensuring your safety. Locate the disconnect switch for your HVAC system or turn off the circuit breaker to prevent any electrical mishaps. Remember, safety first! 2. Verify the Wiring Next, carefully remove the existing thermostat's faceplate. Use your non-contact voltage tester to confirm that no power is flowing to the thermostat. Take a photograph of the existing wiring so that you can easily replicate the setup. 3. Remove the Old Thermostat Gently remove the wires from the terminal block, labeling them with pieces of tape if desired. Once all wires are detached, unscrew the thermostat from the wall and set it aside. 4. Attach the New Thermostat Thread the thermostat wires through the base of your new thermostat. Level it on the wall and secure it with the provided screws. Then, attach the wires to their respective terminals as noted in your earlier photo. Common Misconceptions About Thermostat Wiring One might think that thermostat wiring is a task only for professionals, but that's a misconception. Many homeowners are perfectly capable of wiring their thermostats, provided they follow clear instructions. Dismissing DIY projects denies you the chance to save money and gain new skills! The Value of Tackling This DIY Project Replacing your thermostat can significantly enhance your home's heating efficiency. A modern, smart thermostat could lead to energy savings and greater control over your home's environment. It’s a relatively inexpensive upgrade that pays dividends in comfort and energy costs! Why Knowing This Information Matters For homeowners in Southeast Michigan, understanding how to wire your heat pump thermostat can empower you to make quick fixes yourself, fostering a more self-sufficient lifestyle. Not only does this enhance your home, but it also builds confidence in managing your property’s upkeep. Now, are you feeling more confident about taking on this thermostat wiring task? If you enjoy DIY projects around the house, keep learning and trying new things. Remember, if ever all else fails, there’s no shame in calling in a professional!

07.17.2025

What Homeowners in Michigan Need to Know When Hiring Contractors

Update Understanding Your Home Renovation Needs With more time spent indoors than ever, many of us have started thinking creatively about our living spaces. Whether it's a cozy nook or a full kitchen remodel, home renovations have seen a significant uptick. However, tackling these projects can overwhelm anyone. That’s where hiring the right independent contractor comes in, ensuring your vision becomes a reality without the headaches. Are They Qualified to Transform Your Space? The crucial first step in hiring an independent contractor is verifying their qualifications. While stepping into a new renovation might sound exciting, it's vital that your contractor is well-equipped for the job. An excellent way to gauge this is through their online presence. Review their website showcasing past projects, client testimonials, and qualifications. This will provide insights into their capability and professionalism. In addition to their website, social media platforms can offer a glimpse into their recent works and client interactions. Homeowners might find comfort in seeing how a contractor handles feedback. Essentially, don’t shy away from asking them about their licenses and training. Licensed contractors typically carry a sense of commitment and professionalism that can minimize your worries during the renovation process. Do They Align with Your Vision? After confirming they are qualified, it's crucial to find out if they see the world the same way you do. A great contractor will invest time in understanding your vision. They should be eager and able to visualize the bigger picture of your desires, whether it’s an open concept kitchen or a luxurious spa-like bathroom. Discuss your ideas openly – whether inspired by designs from Pinterest or recent home improvement shows. The goal is a healthy collaboration, ensuring both parties are on the same page before diving into the project. Budgeting: What Can You Afford? Budgeting for renovations can be daunting but breaking it down can help ease the burden. Make a list of priorities for your home transformation. You might want to transform your kitchen today, while a new bathroom can wait. This prioritization not only helps your contractor estimate costs accurately but also allows you to allocate your resources effectively. When discussing budget with potential contractors, don’t merely look for the lowest bid. Instead, consider their overall value: how they align with your vision, their qualifications, and their communication style. An independent contractor who understands your objectives could ultimately save you money by doing the job right the first time. The Importance of References Before finalizing your contractor, ask for references from prior clients. Speaking with previous customers offers valuable insights into their experiences. Ask about communication, reliability, and quality of work. A satisfied client’s recommendation can often help alleviate concerns about moving forward. Checking Reviews and References Online reviews can also play a significant role in determining whether a contractor is the right fit for your project. Platforms like Google, Yelp, and even Facebook can give you a good idea of the contractor’s reputation. Focus on the details given in the reviews - responsiveness, quality of work, and overall satisfaction - as these can highlight their strengths and weaknesses. Getting Everything in Writing Once you decide on a contractor, it’s time to put everything in order. Ensure you have a clear, detailed contract that outlines the project scope, timeline, and payment schedule. This document provides essential protection for both you and the contractor, minimizing misunderstandings. Consider Local Expertise Especially for homeowners in southeast Michigan, hiring a contractor familiar with local building codes and styles is essential. They can navigate the regulations and even provide insight into popular home improvement trends in your area. This local knowledge can provide additional value that online-only contractors may not offer. Your Next Steps With a clearer understanding of what to look out for when hiring an independent contractor, you're better prepared to enhance your home. Remember that this is a partnership, and ensuring both sides are aligned helps tremendously. Start your project with confidence, and enjoy the transformation.

Terms of Service

Privacy Policy

Core Modal Title

Sorry, no results found

You Might Find These Articles Interesting

T
Please Check Your Email
We Will Be Following Up Shortly
*
*
*