Add Row
Add Element
Southeast Michigan Home and Yard Logo
update
update
Add Element
  • Home
  • Categories
    • Home
    • Yard
    • Technology
    • News
    • Food
    • Events
    • Featured

Southeast Michigan

HOME AND YARD

  • Facebook Home and Yard Page
    update
  • update
  • update
  • update
  • update
  • update
  • update
May 14.2025
3 Minutes Read

Fire-Rated Door Installation and Maintenance: Your Home Safety Guide

Technician installing fire-rated door, precise work with tools.

Understanding Fire-Rated Doors: Essential for Home Safety

When it comes to protecting your home from fire hazards, choosing the right fire-rated door is a critical decision. Not only does it act as a barrier to smoke and flames, but the installation and ongoing maintenance also play vital roles in how effective these doors will be in an emergency. A poorly installed or neglected fire-rated door can endanger lives and property, especially in high-risk situations.

The Importance of Proper Installation and Maintenance

Fire-rated doors are more than just heavy slabs of material; they are tested systems designed to withstand high heat for specific periods, usually rated at 20, 60, 90, or 120 minutes depending on their placement in your home. Proper installation ensures these doors perform as intended, effectively slowing the spread of fire and smoke. Regular maintenance checks, ideally every six months, help ensure they remain in working order. It’s worth mentioning that neglecting this aspect can lead to a dangerous scenario where the doors fail when most needed.

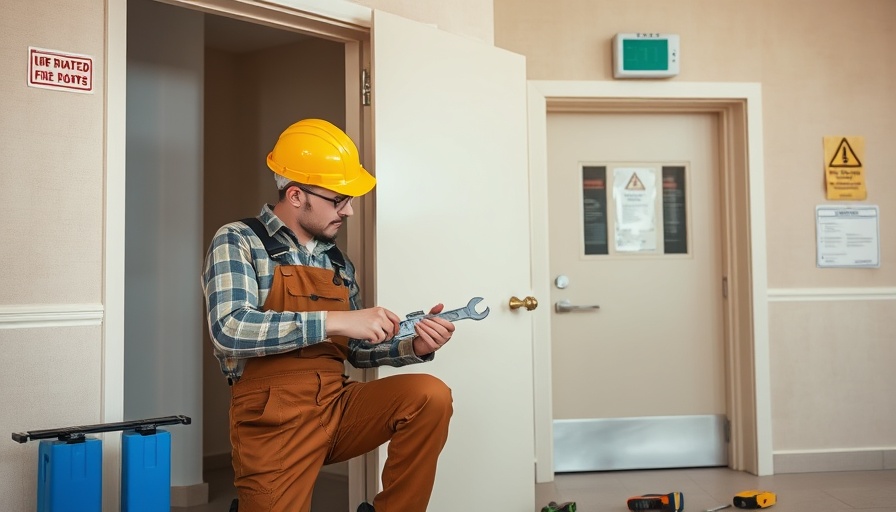
Step-by-Step Guide to Installing Fire-Rated Doors

Before beginning your installation project, it’s crucial to ensure that you have the right materials and tools. Here’s how to get started:

1. Pre-Installation Checks

Before doing anything else, verify the certification and ratings of your fire-rated door and its components. Make sure that the door is rated for the fire protection your home requires—this means checking compliance documentation, specifications, and test certificates.

2. Assessing the Door Opening

Evaluate the wall and ensure it is built from fire-resistant materials matching or exceeding the rating of the door. Inspect for any structural issues and allow adequate clearance around the door for a proper seal when closed.

Correct Installation Steps

Let’s walk through the key steps:

1. Frame Installation

The frame is a critical component of the fire-rated door assembly. When installing the frame, make sure it corresponds to the specifications of the door's certification. Securely attach the frame to non-combustible materials and ensure it is level and plumb. Small misalignments can cause major issues later on.

2. Door Leaf Mounting

With the frame in place, it’s time to mount the door leaf. Follow the manufacturer’s instructions to ensure that the door fits snugly within the frame. Keep in mind that the gaps around the door should be uniform, typically between 3 to 4mm, to ensure proper sealing when closed.

Post-Installation Maintenance Tips

Once your fire-rated door is installed, regular checkups are essential. Here's what to focus on:

1. Visual Inspections

Regularly check for any physical damage such as dents, cracks, or warps. Ensure that the seals and gaskets are intact and free of wear.

2. Functional Tests

Open and close the door to ensure it operates smoothly. It should close completely without any obstruction, and seals should engage effectively.

3. Professional Evaluations

Consider hiring a professional to evaluate the door’s condition and ensure that it meets all safety standards every few years.

Conclusion: Secure Your Home with Fire-Rated Doors

In summary, fire-rated doors are crucial for the safety of your home. By following this guide, homeowners in Southeast Michigan can ensure they choose the right door, install it properly, and maintain it for optimal performance. Investing the time and effort into ensuring that fire-rated doors are in place can mean the difference between safety and disaster during a fire.

As always, if you find any of these tasks daunting or beyond your capabilities, don’t hesitate to call in a professional to ensure a safe outcome!

Home

Write A Comment

*
*
Please complete the captcha to submit your comment.
Related Posts All Posts
04.08.2026

Transform Your Home with Expert Addition Solutions in Foxboro, MA

Update Why Choose a Local Home Addition Contractor? Homeowners in Foxboro, MA, often seek a trusted contractor for their home addition projects. A local expert understands the unique requirements of homes in the area, including architectural styles and local building codes. This knowledge allows them to offer tailored solutions that enhance your family's living space while ensuring compliance with necessary regulations. Benefits of Expanding Your Home Adding space to your home can significantly boost your property value. According to experts, well-planned home additions can yield a return on investment of up to 70%. Whether you're looking to add a significant family room or an extra bedroom, enhancing your living environment fulfills practical needs while creating a more inviting atmosphere. Popular Home Improvement Trends In the world of home renovation, it’s exciting to see trends that cater to owner preferences and lifestyle changes. For instance, open floor plans have gained popularity as they create fluidity between different living spaces. Incorporating smart home technology is another emerging trend, allowing homeowners to control lighting, heating, and security remotely, making the home feel more modern and efficient. Choosing the Right Contractor Selecting the right contractor can transform your renovation dreams into reality. It’s important to vet contractors carefully. Look for licenses, insurance, and positive reviews from previous clients. Engaging a professional enables you to avoid the common pitfalls associated with DIY renovations, ensuring that heavy lifting (both physically and logistically) is handled by experienced hands. Real-life Experiences of Homeowners Many homeowners report satisfaction after adding to their homes. One family in Foxboro shared how their addition not only provided more space but also brought the family closer together. The new kitchen extension quickly became a favorite spot for gatherings. This story underscores the emotional and functional benefits of expanding one's living space. Cost Considerations While home additions can involve significant expenses, proper planning can help manage costs effectively. It’s wise to set a budget and discuss it upfront with your contractor. Most importantly, consider your long-term plans: an addition may require maintenance and renovations down the road, so ensure your investment aligns with your overall vision. Final Thoughts Home additions can revive tired living spaces and boost family harmony. If you’re a homeowner considering a remodel, don’t hesitate. This is your opportunity to create a haven that fits your unique style and needs. Reach out to a professional contractor to explore your options and turn your home expansion dreams into reality.

04.05.2026

DIY Homemade Car Cleaning Slime: A Fun And Effective Solution

Update Transform Your Car Cleaning Routine with Homemade Slime Homeowners in Southeast Michigan are always looking for budget-friendly ways to maintain their homes and vehicles, and what better way than with a homemade car-cleaning slime? This simple DIY project not only brings back a sense of childhood fun but also helps to keep your car interior looking fresh and tidy. Getting Started: Ingredients and Requirements You’re about to channel your inner scientist with just four accessible ingredients found around the house. The best part? You’ll be amazed at how this gooey substance pulls dirt and debris from your car. Here’s what you’ll need to gather: 1 bottle (4 oz.) of Elmer's white glue 2 teaspoons of baking soda A few drops of your favorite blue food coloring (optional) 1-2 tablespoons of contact lens solution (it should contain boric acid or sodium borate, crucial for activating the slime) Don’t forget to fetch a mixing bowl and a plastic spoon for stirring! Step-by-Step Guide to Make Your Car-Cleaning Slime Prepare to get your hands a little sticky! Here’s how to put everything together: Mix the Ingredients: In your bowl, combine the glue, baking soda, and food coloring. Stir well to ensure a homogeneous mixture, then slowly incorporate the contact lens solution, which will cause the mixture to thicken and transform into a slime. Knead Your Slime: Once it’s thick, knead the slime by hand until it’s smooth and elastic. This process takes a few minutes and is a great kids' activity—you can even get them involved! Using the Slime: Test the slime on a small area of your car interior. Use it on hard plastic surfaces such as cup holders and air vents, avoiding upholstery to prevent damage. Fold the slime over to expose a clean side as you collect dirt. Storage Tips: Keep your slime in a zip-lock bag or a small container when not in use. Remember, don't leave it in the hot car! The Environmental Edge of DIY Cleaning Solutions By opting for DIY solutions like this colorful cleaning slime, not only are you saving money, but you’re also making an environmentally responsible choice. Many commercial cleaning products are laden with chemicals that can be harmful to both your health and the environment. Using household items minimizes waste while promoting sustainability—a real win-win for environmentally conscious homeowners. Common Questions About Homemade Cleaning Slime As you harness your newfound car cleaning skill, you might be wondering: Is car cleaning gel reusable? Yes! You can continually fold the dirty parts in to reveal a clean side. How long does it last? It will last as long as it can effectively pick up dirt and debris. When it’s done, just make a fresh batch! Take Action: Unleash Your Inner DIYer! Making this car cleaning slime is a fun experiment that elevates your car care routine. With just a few basic ingredients, you teach kids the science of cleaning while maintaining a tidy vehicle. Ready to give it a go? Gather your materials and dive in! Whether for a weekend project or an engaging homeschool activity, this DIY approach will delight you and inspire your family.

04.04.2026

Discover the Hidden Meaning of Tsurikawa: Heart with Horns in Car Culture

Update What Does a Heart with Horns Really Mean? Have you ever spotted a heart with horns hanging from a car and wondered what it represents? It’s an intriguing image that many might mistake for an unusual ornament or even something related to a quirky automotive modification. In reality, this eye-catching accessory is called a tsurikawa, and it carries a rich history rooted in Japanese car culture. Understanding the Tsurikawa Originally, tsurikawa were practical straps found in Japanese trains, allowing standing passengers to maintain their balance during travel. The term itself comes from the Japanese words “tsuri,” meaning “hang,” and “kawa,” meaning “leather.” However, in the world of automotive culture, this simple accessory has evolved into a symbol of identity, rebellion, and style. From Trains to Cars: A Journey Through Time The transition of tsurikawa from trains to cars can be traced back to the 1970s when Japan saw the rise of Bosozoku gangs, notorious for their flashy customizations and disregard for conventional norms. They would often steal these straps and attach them to their vehicles, making a bold statement against mainstream culture. Over decades, tsurikawa gained a status of prestige among car enthusiasts, embodying a passion for custom automotive expression. Diverse Designs and Meanings Behind Tsurikawa Accessories Today’s tsurikawa come in various designs, from classic rings to vibrant shapes like hearts, stars, and even popular anime characters. Each design not only enhances the aesthetic appeal of a vehicle but also represents a personal statement from the car owner, a hallmark of unique identity in the JDM (Japanese Domestic Market) car scene. The Cultural Impact of Tsurikawa in Automotive Communities The message behind these accessories goes beyond mere decoration; they symbolize a community that thrives on individuality and rebellion against the ordinary. By hanging a tsurikawa on their cars, drivers express their love for car culture and their distinct personalities. This is especially significant for homeowners and car lovers in regions like Southeast Michigan, where automotive passion and DIY spirit flourish. Installing a Tsurikawa: Bringing Japanese Culture to Your Ride Thinking about adding a tsurikawa to your vehicle? Installation is quite simple! You’ll need the strap, a provided installation kit, and a Phillips screwdriver. Choose a location that suits your style—commonly, tsurikawa are attached to the rear or front bumper. It’s essential, however, to avoid using them for towing, which could lead to costly damages. The Global Popularity of Tsurikawa Initially rooted in Japanese culture, the love for tsurikawa has spread globally. In Australia, for instance, car enthusiasts have adopted these unique accessories into their automotive scene. The interesting evolution of tsurikawa highlights how cultural symbols can adapt and resonate with diverse communities across the world. Make a Statement with Tsurikawa The next time you see a heart with horns—don’t just dismiss it as a quirky accessory. Take a moment to appreciate the history and significance behind the tsurikawa. For homeowners and car enthusiasts alike, it could be a fun way to show creativity while respecting the automotive tradition. As you explore ways to personalize your car, consider how this Japanese accessory could reflect your style and passion. With its unique charm and cultural history, a tsurikawa might just be the perfect addition to your vehicle.

Terms of Service

Privacy Policy

Core Modal Title

Sorry, no results found

You Might Find These Articles Interesting

T
Please Check Your Email
We Will Be Following Up Shortly
*
*
*