Add Row
Add Element
Southeast Michigan Home and Yard Logo
update
update
Add Element
  • Home
  • Categories
    • Home
    • Yard
    • Technology
    • News
    • Food
    • Events
    • Featured

Southeast Michigan

HOME AND YARD

  • Facebook Home and Yard Page
    update
  • update
  • update
  • update
  • update
  • update
  • update
May 18.2025
3 Minutes Read

Unlock the Secrets to Polish Your Stainless Steel Sink at Home

How to Polish a Stainless Steel Sink with a sponge in kitchen.

Keeping Your Stainless Steel Sink Shiny

Polishing a stainless steel sink might sound like a chore, but it's one of the simplest and most rewarding home improvement projects you can do—especially for homeowners in Southeast Michigan where sinks face unique wear and tear from the seasons. This simple DIY task can help you maintain not just the sink's appearance but also its functionality as it endures daily use. A clean and shiny sink not only elevates the aesthetics of your kitchen or bathroom but prevents the buildup of grime and unpleasant odors.

The Benefits of Polishing

The main reason to polish your stainless steel sink is about appearance, of course, but there is more to it than meets the eye. Regular polishing smooths out those minuscule scratches where dirt and minerals can settle, making it harder to get completely clean over time. Experts agree that it’s good practice to ensure your sink looks great while extending its lifespan and ensuring a safe preparation space for food and hygiene. One plumber notes, “A polished sink reflects light better and contributes to a brighter overall kitchen space.”

Simple Methods to Try

Now, let’s dive into some effective methods to give your stainless steel sink the love it deserves. Each option is easy to implement and uses common household products, making it ideal for a weekend DIY project.

Using Flour for a Handy Polish

Yes, flour! This kitchen staple can do wonders for your sink. Start by cleaning the sink thoroughly. Once clean, coat the sink with a thick layer of flour, and use a soft cloth to buff it away, illuminating any water stains and smudges. This method not only polishes the sink but is also straight out of grandma’s recipes for a shiny home.

Olive Oil or Mineral Oil—A Glossy Finish

After cleaning, a small amount of olive oil or mineral oil applied with a soft cloth can bring out a beautiful, glossy finish. Buff the oil into the sink along the grain for optimal results. This straightforward method is effective at creating that showroom shine.

Baking Soda and Vinegar: A Natural Approach

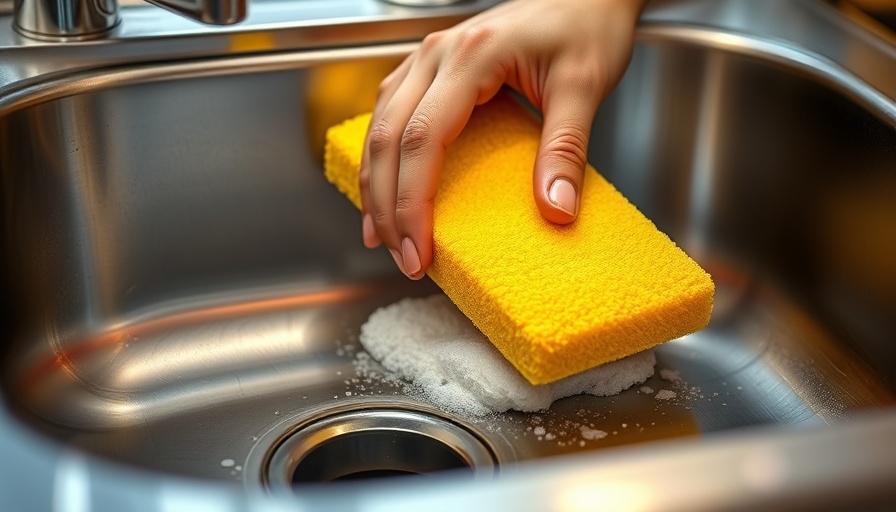
You may have already encountered this brilliant duo in DIY cleaning tips. Sprinkle baking soda on your damp sink, then scrub gently with a soft sponge. Afterward, spray with white vinegar—watch the fizz work its magic! After letting it sit for a few minutes, rinse and dry to leave a sparkling clean sink that smells fresh.

Consider a Commercial Polish

If you're looking for something more powerful, don’t hesitate to pick up a commercial stainless steel polish. Many options are available, and pairing them with a bit of oil at the end enhances the shine and provides lasting protection from future stains.

Why This Matters for Homeowners

Keeping your stainless steel sink shining isn’t just about aesthetics; it’s about maintaining a healthy living space. For residents navigating the often hectic demands of everyday life in Southeast Michigan—from busy family dinners to weekend gatherings—having a clean and polished sink can help you feel more organized and at ease. Plus, it’s a great simple project that encourages DIY culture and the satisfaction of caring for your home yourself.

Get Started Today!

Whether you choose flour, oil, baking soda, or a commercial polish, you now hold the tools and knowledge to keep your stainless steel sink looking its best. The act of caring for your home doesn't just improve its look; it enhances your enjoyment of your space. So roll up your sleeves and get that sink sparkling today! Home improvement is a rewarding journey, and sometimes the littlest tasks yield the biggest satisfaction.

Home

Write A Comment

*
*
Please complete the captcha to submit your comment.
Related Posts All Posts
04.08.2026

Transform Your Home with Expert Addition Solutions in Foxboro, MA

Update Why Choose a Local Home Addition Contractor? Homeowners in Foxboro, MA, often seek a trusted contractor for their home addition projects. A local expert understands the unique requirements of homes in the area, including architectural styles and local building codes. This knowledge allows them to offer tailored solutions that enhance your family's living space while ensuring compliance with necessary regulations. Benefits of Expanding Your Home Adding space to your home can significantly boost your property value. According to experts, well-planned home additions can yield a return on investment of up to 70%. Whether you're looking to add a significant family room or an extra bedroom, enhancing your living environment fulfills practical needs while creating a more inviting atmosphere. Popular Home Improvement Trends In the world of home renovation, it’s exciting to see trends that cater to owner preferences and lifestyle changes. For instance, open floor plans have gained popularity as they create fluidity between different living spaces. Incorporating smart home technology is another emerging trend, allowing homeowners to control lighting, heating, and security remotely, making the home feel more modern and efficient. Choosing the Right Contractor Selecting the right contractor can transform your renovation dreams into reality. It’s important to vet contractors carefully. Look for licenses, insurance, and positive reviews from previous clients. Engaging a professional enables you to avoid the common pitfalls associated with DIY renovations, ensuring that heavy lifting (both physically and logistically) is handled by experienced hands. Real-life Experiences of Homeowners Many homeowners report satisfaction after adding to their homes. One family in Foxboro shared how their addition not only provided more space but also brought the family closer together. The new kitchen extension quickly became a favorite spot for gatherings. This story underscores the emotional and functional benefits of expanding one's living space. Cost Considerations While home additions can involve significant expenses, proper planning can help manage costs effectively. It’s wise to set a budget and discuss it upfront with your contractor. Most importantly, consider your long-term plans: an addition may require maintenance and renovations down the road, so ensure your investment aligns with your overall vision. Final Thoughts Home additions can revive tired living spaces and boost family harmony. If you’re a homeowner considering a remodel, don’t hesitate. This is your opportunity to create a haven that fits your unique style and needs. Reach out to a professional contractor to explore your options and turn your home expansion dreams into reality.

04.05.2026

DIY Homemade Car Cleaning Slime: A Fun And Effective Solution

Update Transform Your Car Cleaning Routine with Homemade Slime Homeowners in Southeast Michigan are always looking for budget-friendly ways to maintain their homes and vehicles, and what better way than with a homemade car-cleaning slime? This simple DIY project not only brings back a sense of childhood fun but also helps to keep your car interior looking fresh and tidy. Getting Started: Ingredients and Requirements You’re about to channel your inner scientist with just four accessible ingredients found around the house. The best part? You’ll be amazed at how this gooey substance pulls dirt and debris from your car. Here’s what you’ll need to gather: 1 bottle (4 oz.) of Elmer's white glue 2 teaspoons of baking soda A few drops of your favorite blue food coloring (optional) 1-2 tablespoons of contact lens solution (it should contain boric acid or sodium borate, crucial for activating the slime) Don’t forget to fetch a mixing bowl and a plastic spoon for stirring! Step-by-Step Guide to Make Your Car-Cleaning Slime Prepare to get your hands a little sticky! Here’s how to put everything together: Mix the Ingredients: In your bowl, combine the glue, baking soda, and food coloring. Stir well to ensure a homogeneous mixture, then slowly incorporate the contact lens solution, which will cause the mixture to thicken and transform into a slime. Knead Your Slime: Once it’s thick, knead the slime by hand until it’s smooth and elastic. This process takes a few minutes and is a great kids' activity—you can even get them involved! Using the Slime: Test the slime on a small area of your car interior. Use it on hard plastic surfaces such as cup holders and air vents, avoiding upholstery to prevent damage. Fold the slime over to expose a clean side as you collect dirt. Storage Tips: Keep your slime in a zip-lock bag or a small container when not in use. Remember, don't leave it in the hot car! The Environmental Edge of DIY Cleaning Solutions By opting for DIY solutions like this colorful cleaning slime, not only are you saving money, but you’re also making an environmentally responsible choice. Many commercial cleaning products are laden with chemicals that can be harmful to both your health and the environment. Using household items minimizes waste while promoting sustainability—a real win-win for environmentally conscious homeowners. Common Questions About Homemade Cleaning Slime As you harness your newfound car cleaning skill, you might be wondering: Is car cleaning gel reusable? Yes! You can continually fold the dirty parts in to reveal a clean side. How long does it last? It will last as long as it can effectively pick up dirt and debris. When it’s done, just make a fresh batch! Take Action: Unleash Your Inner DIYer! Making this car cleaning slime is a fun experiment that elevates your car care routine. With just a few basic ingredients, you teach kids the science of cleaning while maintaining a tidy vehicle. Ready to give it a go? Gather your materials and dive in! Whether for a weekend project or an engaging homeschool activity, this DIY approach will delight you and inspire your family.

04.04.2026

Discover the Hidden Meaning of Tsurikawa: Heart with Horns in Car Culture

Update What Does a Heart with Horns Really Mean? Have you ever spotted a heart with horns hanging from a car and wondered what it represents? It’s an intriguing image that many might mistake for an unusual ornament or even something related to a quirky automotive modification. In reality, this eye-catching accessory is called a tsurikawa, and it carries a rich history rooted in Japanese car culture. Understanding the Tsurikawa Originally, tsurikawa were practical straps found in Japanese trains, allowing standing passengers to maintain their balance during travel. The term itself comes from the Japanese words “tsuri,” meaning “hang,” and “kawa,” meaning “leather.” However, in the world of automotive culture, this simple accessory has evolved into a symbol of identity, rebellion, and style. From Trains to Cars: A Journey Through Time The transition of tsurikawa from trains to cars can be traced back to the 1970s when Japan saw the rise of Bosozoku gangs, notorious for their flashy customizations and disregard for conventional norms. They would often steal these straps and attach them to their vehicles, making a bold statement against mainstream culture. Over decades, tsurikawa gained a status of prestige among car enthusiasts, embodying a passion for custom automotive expression. Diverse Designs and Meanings Behind Tsurikawa Accessories Today’s tsurikawa come in various designs, from classic rings to vibrant shapes like hearts, stars, and even popular anime characters. Each design not only enhances the aesthetic appeal of a vehicle but also represents a personal statement from the car owner, a hallmark of unique identity in the JDM (Japanese Domestic Market) car scene. The Cultural Impact of Tsurikawa in Automotive Communities The message behind these accessories goes beyond mere decoration; they symbolize a community that thrives on individuality and rebellion against the ordinary. By hanging a tsurikawa on their cars, drivers express their love for car culture and their distinct personalities. This is especially significant for homeowners and car lovers in regions like Southeast Michigan, where automotive passion and DIY spirit flourish. Installing a Tsurikawa: Bringing Japanese Culture to Your Ride Thinking about adding a tsurikawa to your vehicle? Installation is quite simple! You’ll need the strap, a provided installation kit, and a Phillips screwdriver. Choose a location that suits your style—commonly, tsurikawa are attached to the rear or front bumper. It’s essential, however, to avoid using them for towing, which could lead to costly damages. The Global Popularity of Tsurikawa Initially rooted in Japanese culture, the love for tsurikawa has spread globally. In Australia, for instance, car enthusiasts have adopted these unique accessories into their automotive scene. The interesting evolution of tsurikawa highlights how cultural symbols can adapt and resonate with diverse communities across the world. Make a Statement with Tsurikawa The next time you see a heart with horns—don’t just dismiss it as a quirky accessory. Take a moment to appreciate the history and significance behind the tsurikawa. For homeowners and car enthusiasts alike, it could be a fun way to show creativity while respecting the automotive tradition. As you explore ways to personalize your car, consider how this Japanese accessory could reflect your style and passion. With its unique charm and cultural history, a tsurikawa might just be the perfect addition to your vehicle.

Terms of Service

Privacy Policy

Core Modal Title

Sorry, no results found

You Might Find These Articles Interesting

T
Please Check Your Email
We Will Be Following Up Shortly
*
*
*